Sunday, January 26, 2014

Soft Beef Taco with Guacamole and Chimichurri Salsa


 Soft Beef Taco with Guacamole and Chimichurri Salsa makes one delicious lunch for a lazy afternoon.

Lots of spices to spruce up your ground beef.

                               Brown the ground beef and add diced tomatoes, onions, potatoes and a couple of minced garlic.  Add a pinch of Oregano, lemon thyme, regular thyme, tarragon, dash of cinnamon and cumin.  Once the mixture has cooked off most of its juices, add a dash or two of red wine.  Allow alcohol to cook off.  Add pink salt for your taste. Add mixture to a warm flour or corn tortilla and garnish with a spoonful of guacamole and a spoonful of Chimichurri Salsa.
Chimichurri Salsa

1/3 cup finely chopped fresh basil
1/3 cup finely chopped cilantro
3/4 cup heirloom tomatoes
2 Tablespoons finely chopped fresh oregano
2 chiles-chopped
1/4 cup white or red onion finely chopped
1 large minced garlic clove
squirt of lime juice
6 Tablespoons apple cider vinegar
drizzle of olive oil
Salt and fresh cracked black pepper


Hope you like this recipe and invite you to visit my food blog on Facebook where I am saving family recipes for my daughter.


Thursday, January 16, 2014

Apple Chips

When you have an abundance of apples is the time to make some apple chips with the use of your dehydrator.  My favorite apple to dehydrate are Pink Ladies.
 Peel and Core your apples.
 Slice your apples.
 Place your sliced apples in 1/2 cup of lemon juice to keep your apples from turning brown.  Add two tablespoons of sugar and one tablespoon of cinnamon to lemon juice to help offset the lemon tart taste.   Place slices on dehydrator trays and dehydrate until the chips are crisp. For my dehydrator that is around 12-hours.
Store and enjoy!  

Monday, January 13, 2014

Flour Tortillas

How to make flour tortillas.
Flour Tortillas made with Butter

This recipe is for 20-tortillas.  You can divide the recipe for smaller quantities.

4 1/2-cups All Purpose Flour
2-Teaspoons of Baking Powder
1-Teaspoon of Salt

Combine all the ingredients above in a large bowl.

2-Tablespoon Butter (room temperature)

Cut butter into flour.  Once you are done you should not be able to feel any lumps of butter in flour.  Very important:  You must allow this mixture to rest a minimum of 15-minutes.  

2 cup of hot water (from the tap)

Pour 2 cups of water into flour and mix into dough.  If the dough fills dry add a little more water.  (Note: The water in the air will affect your dough.)

Move dough to a floured cutting board and knead to form dough for Tortillas. You shouldn't have to knead the dough for more then 2-minutes.  Now the next most important step:  Allow the dough to rest 10-minutes.

Knead in your hand
Pinch a ball of dough from dough you just kneaded.  You are now going to knead this small ball of dough into a flat circle.
Pinch a ball of dough


This should take a few seconds
   
Rest 15-minutes

Once you have made all you little balls of dough you must allow this dough to rest at least 15-minutes.  In the meantime you can get your skillet heating up.  I use a cast iron skillet and the temperature is set a little higher then medium. 

The video above will demonstrate how to knead the ball of dough and tricks on how to roll out your flour tortilla.  It will also demonstrate how long it takes to cook one tortilla.  


When you have finished making your tortillas wrap them in a cotton dish towel.  I always place a paper towel under the bottom tortilla to help absorb some of the steam which will be steaming off the freshly made tortillas.  This dish towel will help to keep your tortillas soft. Once the tortillas have totally cooled off I place the tortillas wrapped in the dish towel in a plastic bag and store them in the refrigerator.

If you are counting calories:  The flour I used stated 330 calories per 3/4 cup. The butter 100 per tablespoon ...you can reduce the calories by using Pam spray or a lower calorie fat.


Sunday, January 12, 2014

Cinnamon Rolls

One of our family favorite are my cinnamon rolls.  The dough is mixed in our bread maker.  
1-cup warm Whipping Cream
3-eggs room temperature
1/3 cup room temperature unsalted butter
5-cups All Purpose flour sifted twice
1 teaspoon salt
1-cup sifted sugar
2-package Yeast

Place all the ingredients in the order above in your bread maker and set machine to the dough setting.

Once the machine beeps remove the dough and place on cutting board and roll out.
Spread 1/3 cup of butter on dough, spread 1-1/4 cup of light brown sugar on butter, sprinkle cinnamon on brown sugar like you would do for cinnamon toast.  Roll tightly and cut cinnamon buns into 2" slices.  Place on parchment paper and let slices rest at least 1-hour before you place them in the oven.

Filling:
1/3 cup butter room temperature
1-1/4 cup light brown sugar
Ground Cinnamon powder

Bake at 375.  Have oven at this temperature for at least 15-minutes before you place rolls in the oven.    Rolls will bake at exactly 19 minutes. 
Set oven timer for 10-minutes after you place rolls in oven.  Once alarm goes off turn ...rotate your baking dish for even baking and set the oven timer for 9-minutes.  Remove from oven after 19-minutes.  Allow to cool before you frost.

You can serve the cinnamon buns plain or with frosting:

1-bar of Cream Cheese (Philly is the best)
3/4 cups of butter
1-3/4 cups of sifted powder sugar
1-teaspoon vanilla
tiny pinch of salt 

Place Cream Cheese and Butter in kitchen aid and blend until creamy.  Add powder sugar slowly.  Add vanilla and pinch of salt blend one last time.  Ready to spread.

Friday, January 10, 2014

Huevos Rancheros


Huevos Rancheros a favorite breakfast dish to order.  There are many ways to make Chile Verde for your Huevos Rancheros, but today I am going to show you the easy way.
 

I like Las Palmas Green Chile Enchilada Sauce and for the corn tortillas select your favorite brand.

Warm up some corn tortillas.  I warm them on the grill but you can microwave them for a few seconds just to make them soft.

In a cast iron skillet add just enough sauce to cover the bottom portion of the skillet...like you see here.  Add a warmed corn tortilla to sauce for a few seconds...turn tortilla over for another few seconds.  Now place cooked tortilla on plate.

Move sauce to the side and create an area to fry two eggs.  Add a little oil...add eggs..
Turn eggs over for over medium eggs.  Place on plate and serve with what ever you would like to serve for breakfast.


I like to serve with Guacamole and shredded cabbage.
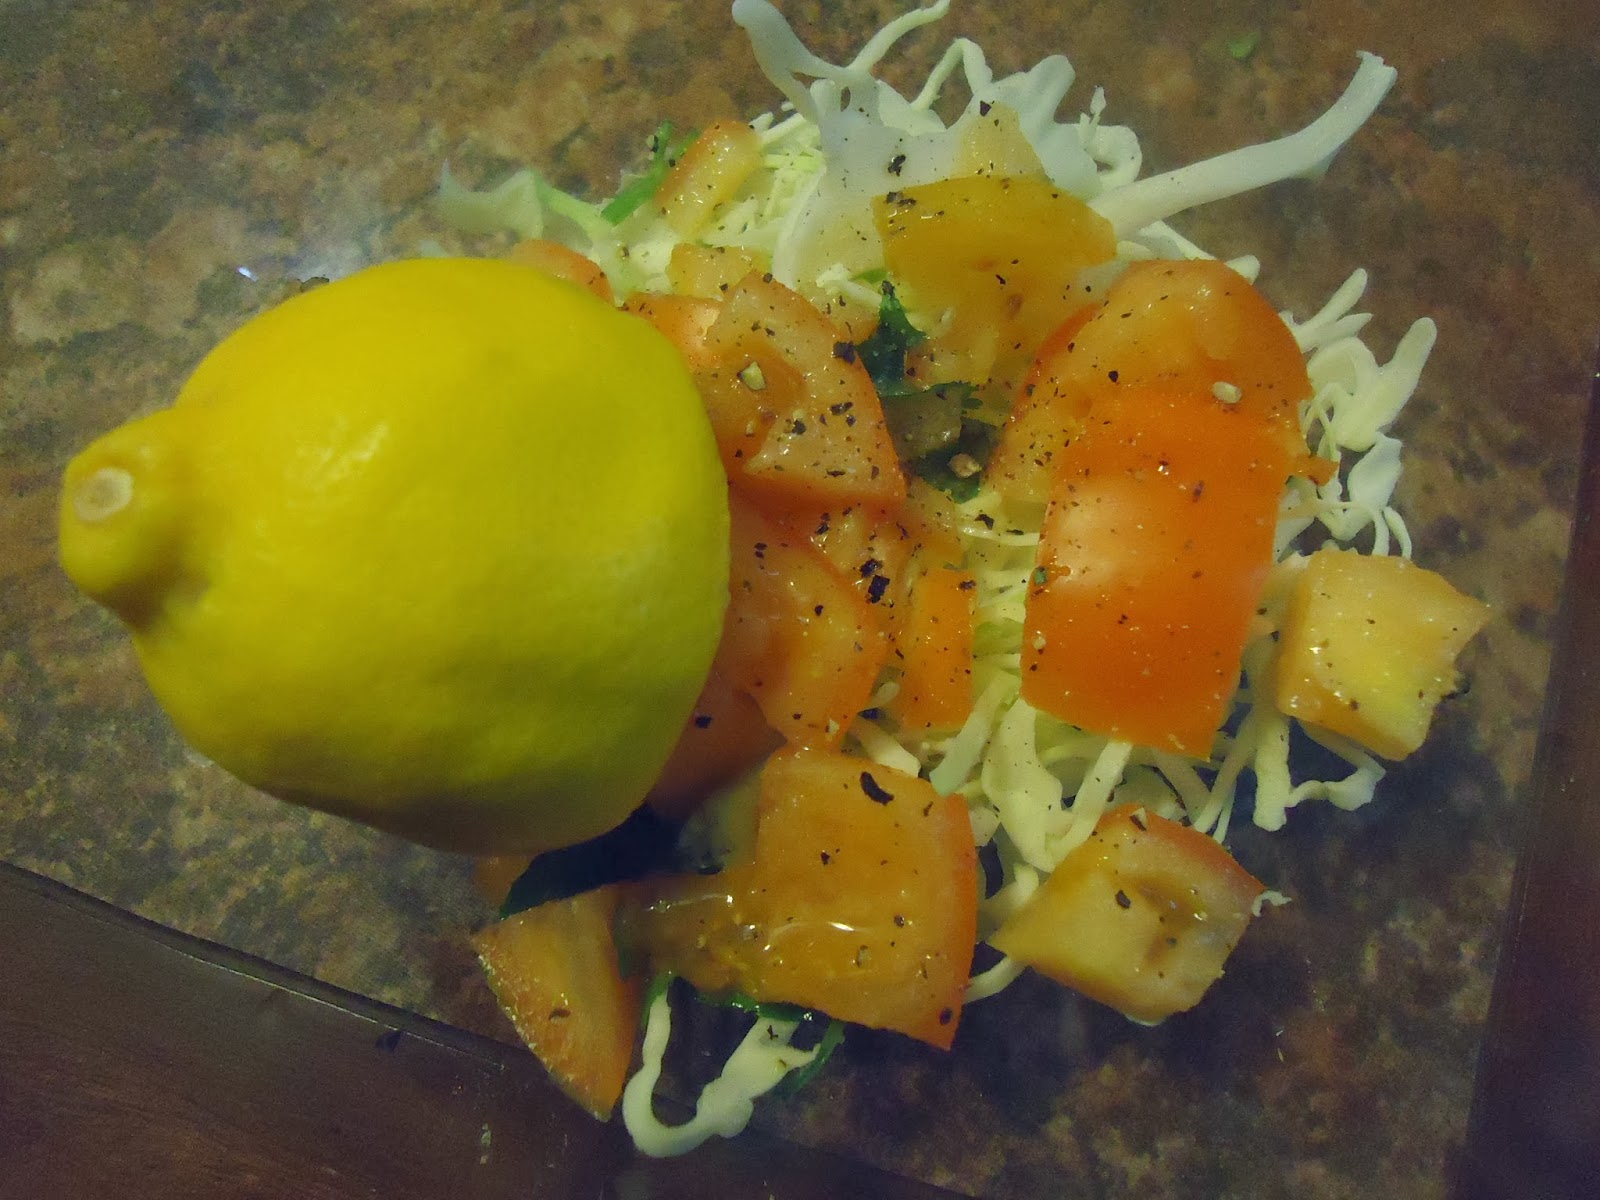
We always serve a small fresh salad for breakfast with fresh lemon, coarse black pepper and a dash of salt. 

Enjoy!

Tuesday, January 7, 2014

Curing Green Olives

Green Olives come into season in our area from October through December.
Tools used plus a long plastic pipe, plastic gloves, and dish towels

Find a local grower or pick your own olives.  This recipe is for a 5-gallon bucket of green olives which are relatively the same size and green in color, are freshly picked, washed, and stems removed.
Place the green olives in a plastic tote which will hold 10-gallons of liquid.  

In a clean 5-gallon plastic bucket fill 3/4 of the bucket with cold water.  Add 12 oz. of Lye 100% into the bucket of water (follow safety instructions on Lye container) for jumbo olives and 10 oz of Lye for medium to small.  Stir water with plastic pipe to help dissolve the lye in the water.  Add more water to bucket to fill to the top.  Carefully pour lye water into plastic tote.  


Get a cotton dish towel and gently place on top of green olives.  Use plastic pipe to help arrange the dish towel in the tote as seen above. Record time you added lye into olives and start your count down. Start testing your olives with the "V" cut after 6-hours of curing. I have found it is better to start testing the olives early.   Then at least every 1-hours before they should be cured.  Testing: Select an olive (wear gloves), rinse the olive with water, cut a "V" into the olive meat and remove the "V" section to see if the meat has been cooked to the olive pit. The olives are cured when the meat is easily removed from the pit. After doing this you will be able to fine tune how much time you need to leave the olives cooking in the lye.


Once the meat is cooked to the pit carefully remove the towels and the lye water; add cold water into the tote.  I add at least 3" of water above the olives.  I will rinse the olives at least 3-times a day (remove water add fresh water).  After 10-days the water will start to clear up.  At this point I will taste an olive to test if the bitter taste is gone.  If not continue to drain, rinse, and add fresh cold water.  Once you are satisfied with the results drain, rinse, add cold water and add brine (salt water).  In a 5-gallon bucket of cold water dissolve 1-cup of salt and pour over green olives.

Enjoy.

Update 10.27.14:
I accidentally over cooked my green olives this year...Now what? I pureed the overcooked pitted green olives and have used it as a substitute for butter when making flour tortillas.
For the chunky base left over from the puree...I will make a green olive pesto or add to my green olive tamales.

UPDATE: 11.14.2015 
Last year I over cooked my first batch of green olives and I followed my recipe which I have followed for years, so I was quite surprised. This year I decide to start checking my olives after 6-hours of curing and they are almost cooked. I did one thing different because I was short with time this past week. I stored my olives in cold water outside for a week. I don't think that had anything to do with them cooking more quickly...I think the Lye is stronger....you might want to use less Lye.

I hope you can follow me at: 

Spinach and Caramelized Onion Quiche


Spinach and Caramelized Onion Quiche

I love caramelized onions! Their delicate taste is sweet 
and they just beg to be married with something absolutely delicious. 
Butter and a drizzle of Peanut Oil
Saute 4-cups of diced yellow onions with a drizzle of Peanut Oil and 1/4 cup of butter. This was roughly 5-whole onions.


One of Chef Gordon Ramsey's YouTube video instructs do not cut through the root portion of the onion and you will not shed tears when dicing the onion.

Caramelized Onions 
Once the onions have caramelized (4-5 minutes) add 1/2 cup of red wine to the caramelized onions.  Allow the alcohol to burn off, turn off burner and allow the mixture to residue cook.


This Quiche recipe is for a Pyrex 10-inch Deep Pie plate.  

I use my Kitchen Aid to scramble the eggs, but a fork and bowl will do the same job.  

Scramble 14-medium size eggs. Add 1/4 cup heavy whipping cream, 2-1/2 teaspoons freshly ground Allspice, 2-teaspoons Cream of Tartar, a pinch of Pink Salt, a pinch of Black Pepper.

Once you are happy with  this mixture cut in 3/4 cups of Spinach (previously frozen, thawed and drained spinach). The spinach has to be dry so squeeze all the moisture out (note: place spinach in a paper towel, roll and press with your hands to remove extra moisture). 


Set oven at 350 degrees and allow oven to be at this temperature for at least 20-minutes before you set your pie crust inside.  Place your unfilled pie crust in the oven for 10-minutes, carefully remove from oven and set aside.

The caramelized onions in the skillet have been absorbing all the delicious flavours from the red wine while you were preparing the egg mixture and getting the pie crust ready.  Now bring the heat back up on the caramelized onion skillet, then add the egg mixture to the caramelized onions, the egg mixture is in the skillet for only 30-40 seconds. Now pour the mixture into the pie crust.

Lastly, get a good handful of grated Smoked Gouda/Bacon Cheese and arrange the cheese on the top of the Quiche.  With a spoon force the cheese into the mixture. I do this step because I want to make sure every portion of my quiche has this delicious cheese. Place in oven on the lower rack. 

I heat up my mixture before I pour it into the pie crust because I want the same temperature in the whole pie as soon as I place it in the oven and I have found this method works best for me.

Bake at 350 degrees for 45-minutes or as soon as your knife comes out clean/dry.


  The Quiche is light but dense with flavor.  


Pictured below is a Artichoke Heart/Green Olives Spicy Carrot Quiche.  I had an extra pie crust so I made another delicious combination.  Same egg mixture as mentioned above.  Saute 1/2 cup sliced green olives, 1/4 cup diced spicy carrots, 1/2 cup artichoke hearts, 1/2 cup fried breakfast potatoes, 3-roasted and skinned anaheim peppers (Chile rellano peppers).  Saute with a drizzle of peanut oil, 1/4 cup butter, 1/2 cup red wine.  I like to saute in a cast iron skillet.

Artichoke hearts, Green Olives, Spicy Carrot Quiche

Note:  Lightly season your pie crust with Montreal Steak seasoning.

Hope you like this recipe and invite you to visit my food blog on Facebook where I am saving family recipes for my daughter.


Saturday, January 4, 2014

Chile Colorado Sauce

Chile Colorado Sauce

Chile Pods Drying
The delicious spicy velvety taste of fresh Chile Colorado sauce just tantalizes your taste buds with WOW give me more! Once you have tasted this magnificent staple to the Mexican diet you will never go back to making Chile Colorado from packaged dried red chile pods, red California or New Mexico Chile powder, or canned Red Chile Sauce.


Fresh Chile Colorado
Chile Colorado peppers are green Anaheim chiles left on the plant to mature and ripen to this beautiful red color.

I buy the ripen Anaheim peppers at our local Farmer Market during the late summer months and will purchase several cases so that I can have this ingredient on hand throughout the year. I vacuum package and freeze the sauce in small portions for future Mexican dishes like, Enchiladas, Tamales, mole, Menudo, Posole, Chilaquiles, chile beans, Nopales, and my special BBQ sauce.

Roasted Chile Colorado
Roast the chile's slowly in a dry cast iron skillet (no oil).  Set the heat on Med/low and toast/blister the tough skins on the chile's. 

Place chiles in a stainless steel pot and cover.  This will allow the chile pods to cool and will also make skinning the chile's easier.  Also, roast a couple of garlic cloves.


Skinned, stemmed and seeds removed Chile Colorado
After you have skinned the chile's remove the stem and the seeds. You might want to wear some plastic gloves to protection your fingers from the heat of the chile.  There are around 30-roasted chiles for this recipe.


Equipment you will need to get a velvety sauce
Your next step will be to blend the pulp.  Add a little water to the pulp and a couple of roasted garlic.  The texture that you are after will be like tomato sauce. Pour the sauce in a sieve to check if any skins were left attached to the chile's or seeds.


Blended and sieved Chile Colorado 
Using a cast iron skillet fry the sauce with some extra virgin olive oil.  Which ever size of skillet you use, coat the bottom of the skillet with oil. Add the sauce to the oil before it gets hot or it will splatter.


Set the heat to medium and start to fry the sauce.  The color of the chile will change.  It will change from a bright red to a dull red. 


Once the chile is a dull red transfer the chile to a stainless steel pot and reduce the sauce.

You might ask why fry in a cast iron and then transfer to a stainless steel pot to reduce? More clean up right!  The flavor improves when fried in a cast iron skillet.  So you transfer the sauce to a pot and add 2-cans of chicken stock and 2-teaspoon of cumin.  Do not add salt until you are almost done.  Allow the flavor from your chicken stock to enhance your sauce.  When a wooden spoon can stand in the sauce you are done.  Note: I cook my own chicken stock.

These are the ingredients that I use to make my Chile Colorado sauce.

Salt to your taste
30-Red Anaheim Peppers
2-teaspoons Ground Cumin
2-3 Garlic Cloves
2-cans Chicken stock or 
Add 2-3 Tablespoons of Chicken Bouillon 

Equipment you will need:
Cast Iron Skillet
Stainless steel pot or large container
Lid for container or aluminium foil
Plastic gloves (Optional)
Blender or bullet
Sieve or strainer 

Please visit and like my Facebook blog at